Check-in is an important first step in air travel. In recent years, with the rise of online check-ins and self-service options, the methods of checking in have become more diverse. For those who haven’t flown in a while, the changes at the airport may come as a surprise.
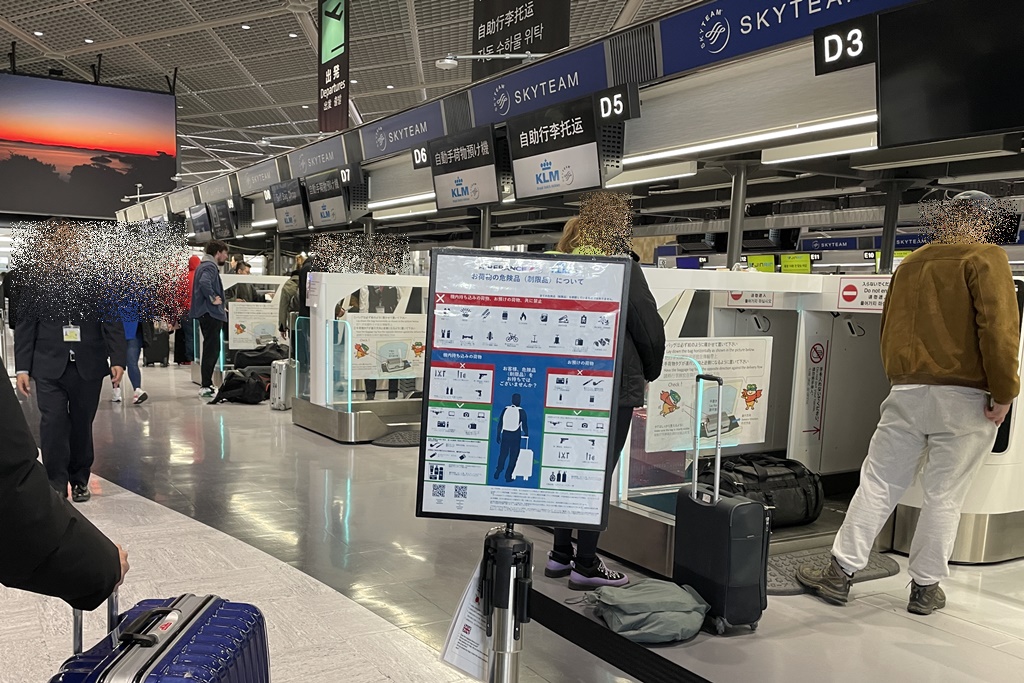
When I used Narita Airport for an international flight for the first time since 2018, it was a little surprise for me (and my child) to see that most of the traditional check-in counters had been replaced by machines. The presence of staff had decreased, and instead, rows of self-check-in machines and conveyor belts were neatly arranged. Nearby, there was only one foreign staff member standing by to offer support.
Fortunately, having traveled by plane many times before and having observed the work of check-in counter staff with interest (in fact, I once wanted to work at an airport!), I was already familiar with the check-in process, so I was able to complete the procedure using the machines without any issues.
Since many airlines and airports have similar check-in processes, I believe it’s not too difficult to understand what to do, even if it’s your first time at a particular airport.
How to Use Self Check-in at the Airport
Self-check-in refers to the method where you use a dedicated terminal set up at the airport to complete your boarding procedures on your own. By entering your booking number and scanning your passport, a boarding pass is issued, and you can then attach your own baggage tags and send it off.
The big advantage is that you can proceed with the process without having to go through a staff member, helping you avoid the long lines at the counter.
How to Use Airport Self Check-in

I used self-check-in at Narita Airport. When traveling from the UK to Japan, I completed online check-in at home and used the baggage drop at the check-in counter. However, for my return flight from Narita to the UK, I did not complete online check-in and went directly to the airport. Since we had already reserved our seats, we intended to check-in at the airport. As mentioned above, we discovered that the self-check-in machines were lined up in rows.
Anyway, the steps for self-check-in are as follows:
First, we needed to issue our boarding passes. There were kiosks for this, so I entered our booking information and scanned my passport. The kiosk received the information and issued boarding passes for both me and my child.
If you’ve already completed online check-in, you should already have your boarding pass, so you can proceed directly to step 2.
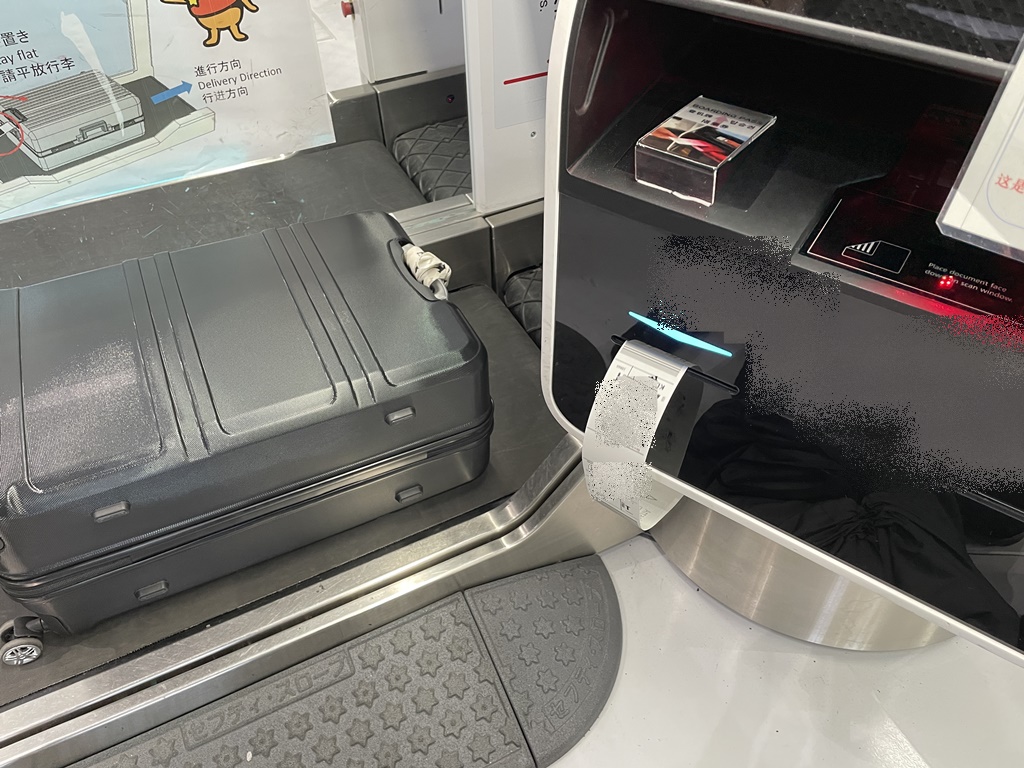
With our boarding passes in hand, we took our suitcases to the baggage drop kiosk (there was another machine for this!). When I scanned my boarding pass at the kiosk, a baggage tag was printed. When I scanned my boarding pass at the kiosk, a baggage tag for my baggage was printed. Next, I scanned my child’s boarding pass, and we received a total of two baggage tags.
We then attached them to our suitcases.
Here are some points I thought should be kept in mind (the same applies if the baggage is box-shaped or similar):
- The position of the baggage tag should be such that it is easy to scan when the baggage is placed on the conveyor belt.
To achieve this, I thought it would be better to attach the baggage tag to the side handle of the suitcase, rather than the top handle (though I believe it depends on the shape of the suitcase). - The baggage tag is in the form of a sticker. First, thread the tag through the handle of the suitcase. Once both ends of the tag are aligned, seal the entire adhesive part of the tag (I don’t remember whether it was the type where you peel off the backing paper or the type that sticks by pressing the sticker together). To ensure the tag doesn’t come off during transport, it’s best to seal the entire tag securely, all the way to the handle of the suitcase, rather than just closing the ends.
- For box-like baggage, it should be sufficient to attach the tag to the top of the box.
After attaching the baggage tag, we placed the suitcase flat on the conveyor belt to ensure the tag was easy to scan. Then, the weight of the luggage was automatically measured, and after the tag was scanned, the conveyor belt started moving and the luggage was automatically transported.
I was very impressed with this system. Our baggage was accurately sent to the correct flight, and I thought it would reduce human errors.
At the same time, a “Customer Baggage Receipt” was issued to each of us. We kept them safe until we successfully received our suitcases at our final destination, as we would need to present them to the airline if our suitcase did not appear at the pickup point.
After completing the self-check-in process, we were able to head to the security check.

Advantages of Self Check-in at the Airport
The biggest advantage of self check-in is that the process is quick and efficient. By avoiding long lines at the counter, you can receive your boarding pass in just a few minutes, saving a lot of time. Especially in airports with many kiosks, I believe the process can run relatively smoothly even during peak hours. It is an ideal method for those who want to reduce time and stress. However, for those who are not familiar with using machines or are using the self check-in process for the first time, it may cause some stress.
Disadvantages of Self Check-in at the Airport
The disadvantage of self check-in, as mentioned above, is that if you are not familiar with operating the machines, the process may take longer than expected. For those flying for the first time, the check-in process might be confusing, and they may not know what to do.
Additionally, if the machine malfunctions or encounters any issues, you will ultimately need to approach a staff member for assistance.
Also, for travellers with children, or those checking in luggage that requires additional fees or fragile items, it is generally necessary to complete the process at the counter.
What is Airport Check-in?
Airport Check-in is one of the essential procedures required when boarding an airplane. During this process, you confirm with the airline that you will be boarding the flight and receive a boarding pass. Additionally, if you have checked luggage, you will hand it over and complete the necessary procedures at this stage.
Can I Check-in at the Airport?
Of course, the airport is the fundamental place for Check-in, where you can either request assistance from staff at the Check-in counter or use self-Check-in terminals to complete the process yourself. In recent years, the number of staff has decreased, and automation has become more prevalent. If you need help or have questions while using self-Check-in, you will need to approach the staff available nearby.
It is generally recommended to arrive at the airport 2–3 hours before your flight to complete the Check-in process. Arriving early ensures that the procedures can be carried out smoothly.
What Can I Check-in at the Airport?
Checked baggage at the airport includes large items that are difficult to bring into the cabin and items restricted by the airline from being carried on board. Specific examples include the following, but detailed regulations vary by airline, so it is recommended to check before you start packing:
-Suitcases and Large Items
Items must comply with the size and weight limits set by the airline. Exceeding these limits will incur additional fees, so confirming in advance is important.
-Liquids and Gel-Like Items
Liquids in containers larger than 100ml, which are restricted for cabin carry-on, must be placed in checked baggage. Alcoholic beverages are also allowed, provided they meet the specific alcohol content regulations.
-Items Prohibited from Cabin Carry-On
Knives, scissors, large tools, baseball bats, rackets, hockey sticks, and other sports equipment must be checked in.
Can Check-in Before Arriving at the Airport?
Of course, it is possible and convenient to Check-in before arriving at the airport, and I recommend doing so. By using the airline’s website or mobile app for “online Check-in,” you can enjoy the following benefits:
- You can save your boarding pass to your smartphone or print it at home.
- At the airport, you only need to drop off your suitcase, simplifying the procedure.
- You can check and select your seat in advance, increasing the chances of getting your preferred seat.
Personally, I have been checking in online at home for over 10 years now. Since I travel with my children, I prefer to prepare everything in advance to avoid any issues at the airport that might cause us to miss our flight. Online Check-in is typically available 24–48 hours before departure (some international flights allow Check-in as early as 72 hours prior). I used to carry printed boarding passes, but now I can also use the option of saving boarding passes on my smartphone.
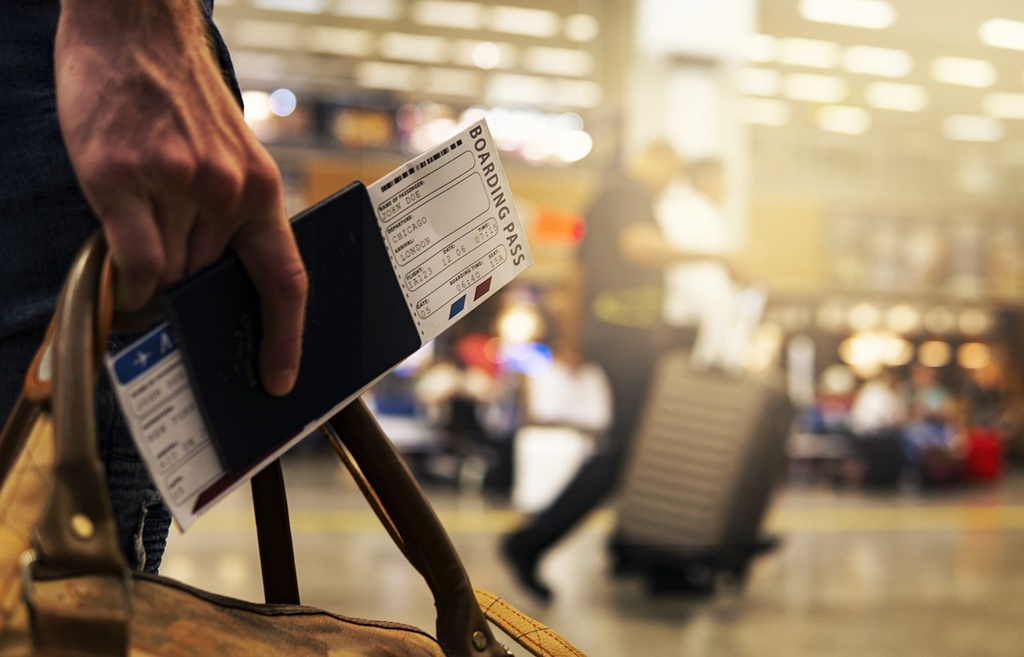
In March, for the flight from the UK to Japan with one of my children, we downloaded the boarding passes onto each of our smartphones. Additionally, we prepared printed copies of the boarding passes and itinerary as a backup, just in case the smartphones were lost, ran out of battery, or we couldn’t locate the boarding passes within the phone.
However, at several points in the airport, the printed boarding pass turned out to be more convenient. There were a few occasions when we needed to present the boarding pass, and it was easier to simply pull out the printed version rather than take out the phone and search for the ticket on it. Since we had to present our passports as well, it would have been more practical to keep the printed boarding passes inserted in the passports.
Should I Check-in before arriving at the airport?
Online Check-in is not mandatory, but I think it’s a good idea to use it as it offers many conveniences. You can complete the Check-in process in a calm environment, such as at home or in the office, and you can also check and select your seat in advance. However, if you have checked luggage, you will need to drop it off at the airport. This can be done by requesting at the counter or by using a self-service machine.
Can I Web Check-in at the Airport?
Yes, it is possible to do web Check-in at the airport. Online Check-in is a system where you use a smartphone or computer to complete the process through the airline’s website or app. By using the airport’s free Wi-Fi or mobile network, you can do web Check-in even after arriving at the airport. However, if you have luggage to be checked, you will need to drop off your luggage at the bag drop counter after completing the Check-in. Also, if you need a printed boarding pass, you can print it at a self-Check-in kiosk or the counter.
However, please note that the airline’s online Check-in has a deadline, and after that time, web Check-in will not be available. Generally, online Check-in is available from 24 hours to 75 minutes before the flight’s departure. If you miss this deadline, you will need to Check-in directly at the airport. In this case, you will need to use either the Check-in counter or the self-Check-in kiosk, but during busy periods or peak times, you may have to wait in line. Therefore, if you want to choose your seat in advance or simplify your airport process, it is recommended to complete online Check-in as early as possible.


